Contents
Genomics to Notebook (g2nb) combines the accessibility and research narrative capabilities of Jupyter with the genomics tools available in Galaxy, GenePattern, and other popular bioinformatics platforms, adding many features for ease of use by non-programming scientists.
1. Login or register with g2nb
A. Login or register
To use the g2nb environment, you will need a GenePattern, Google, or Globus account. If you do not already have one, click here to register to: GenePattern, Google, or Globus.
Once you have an account, you can begin using g2nb on the g2nb Workspace or click on "Get Started". This option requires no installation and provides the advantage of running your notebooks in the Amazon cloud. If you wish to install the g2nb environment on a local machine, you can follow these instructions.
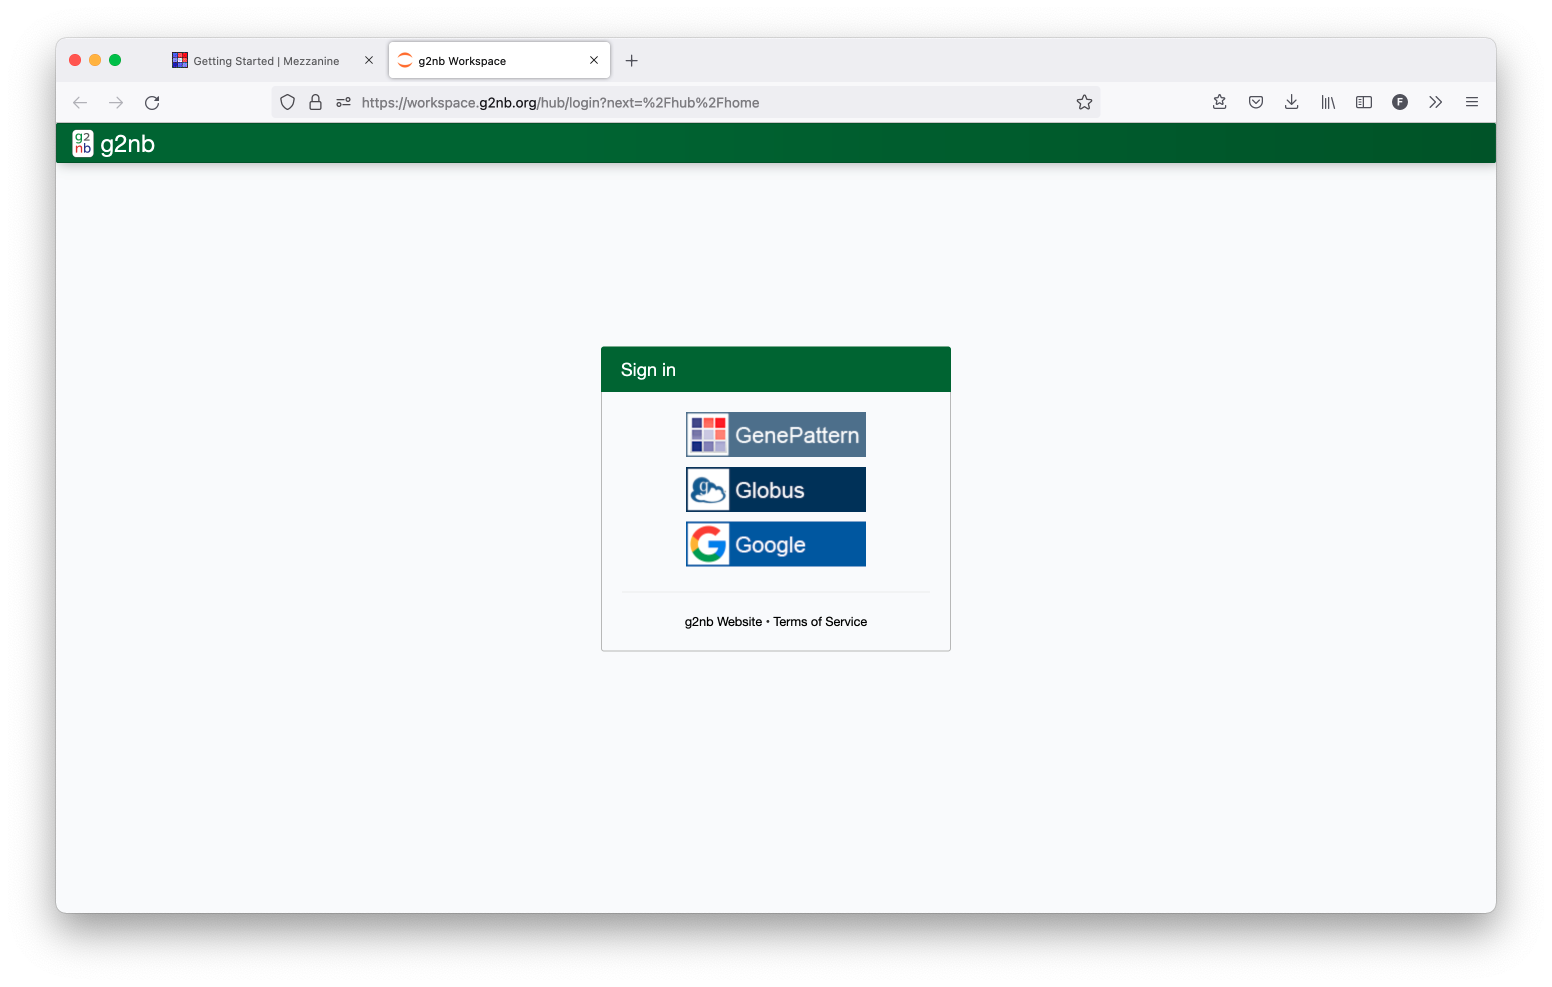
B. Login to g2nb
Open up the g2nb Workspace and then log in with your g2nb account.
2. Using the g2nb Workspace
A. Navigating the workspace
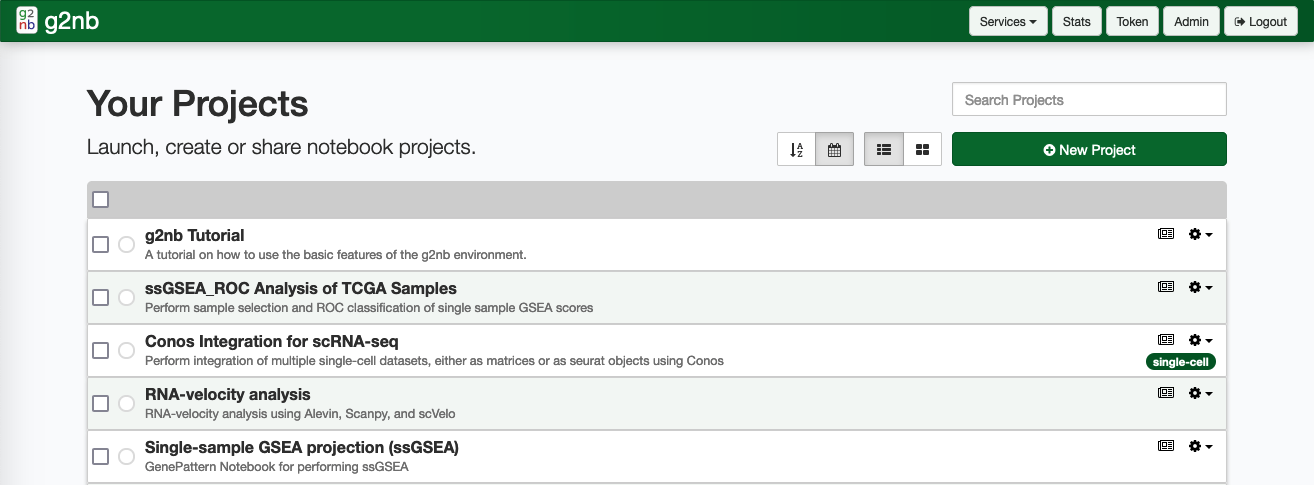
i. Your Projects
The Your Projects section contains your personal workspace. Listed here are the notebook projects which are private to your account. Here you can create new projects, edit them or launch them as desired. You are also be able to publish and share projects here.
ii. Public Library
The g2nb Workspace provides a library of public notebooks, which can serve as templates or examples when creating your own. These notebooks can be accessed from the Public Library section. Preview Notebook Library
- Public projects are tagged and divided into several different categories. Featured notebooks have been selected because they provide templates for relevant bioinformatics and machine learning workflows.
- Tutorial notebooks teach how to use different g2nb features, including advanced programmatic features.
- Community notebooks are those that have been contributed by the g2nb community.
- Finally, Workshop notebooks have been used by the g2nb team for one of our workshops, seminars, or bootcamps.
iii. Shared With Me
If any notebook projects have been shared with you, they will appear in a section titled Shared With Me. If this section is missing, it is because you haven''t had any projects shared with you yet.
B. Open an existing notebook project
i. Opening from the Public Library
While browsing the Public Library, clicking on any project will open a dialog box.
This gives you the option to view information about the project or run the project. Note that running a project will add a copy of it to your personal workspace.
ii. Opening from your personal workspace
Clicking on any notebook project in the list will open it in a new tab.
C. Create a new notebook project
To create a new blank project, click on the New Project button. This will open a dialog prompting you to give the project a name, select and environment and, optionally, give it a description.
3. Using g2nb tools in a notebook
Once a notebook project has been launched, a Toolbox panel will be available on the lefthand side of the interface. Opening this panel displays the list of available g2nb tools. Clicking on a tool in the list adds it to the currently selected notebook document.
For general information on how to use Jupyter, see the Jupyter documentation.
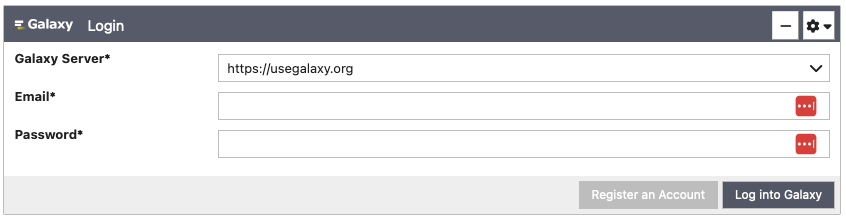
A. Authentication cells
Certain g2nb-enabled platforms, such as GenePattern or Galaxy, require authentication. To use these platforms, first insert an Authentication Cell. This can be accomplished by clicking on "Galaxy Login" or "GenePattern Login" in the toolbox.
This adds a new cell to your notebook with a login form for the selected platform. Enter your credentials, then click "Log into ...".
B. Begin an analysis
Once you''re signed in, all of the analyses available on the selected platform will appear as separate tools in the g2nb toolbox.
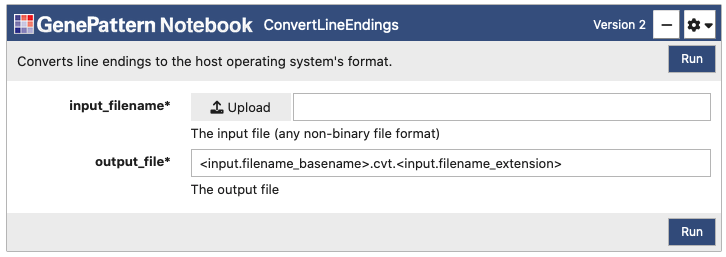
You can search through these analyses using the search box found at the top of toolbox panel. Once you have selected an analysis, click it to add it as a cell in the notebook.
Each analysis has a number of parameters, which can be used to upload data and to select other options for the analysis. Once you fill in these parameters, click "Run" to submit them as a job to the GenePattern or Galaxy server.
Once the "Run" button has been clicked, all selected files will upload and then the cell will change to indicate the status of the job in the queue. Jobs progress through the states of Pending, Running and finally either to Completed or Error.

C. Working with Results
When an analysis is completed, the cell will display the result files. Clicking on one of these files will show a menu of options, such as viewing the file, using the output programmatically in Python code or sending the file to a downstream analysis. If an analysis resulted in an error, it will present an error log. This file can be viewed to determine what went wrong with the analysis.
